Tuesday, January 27, 2015

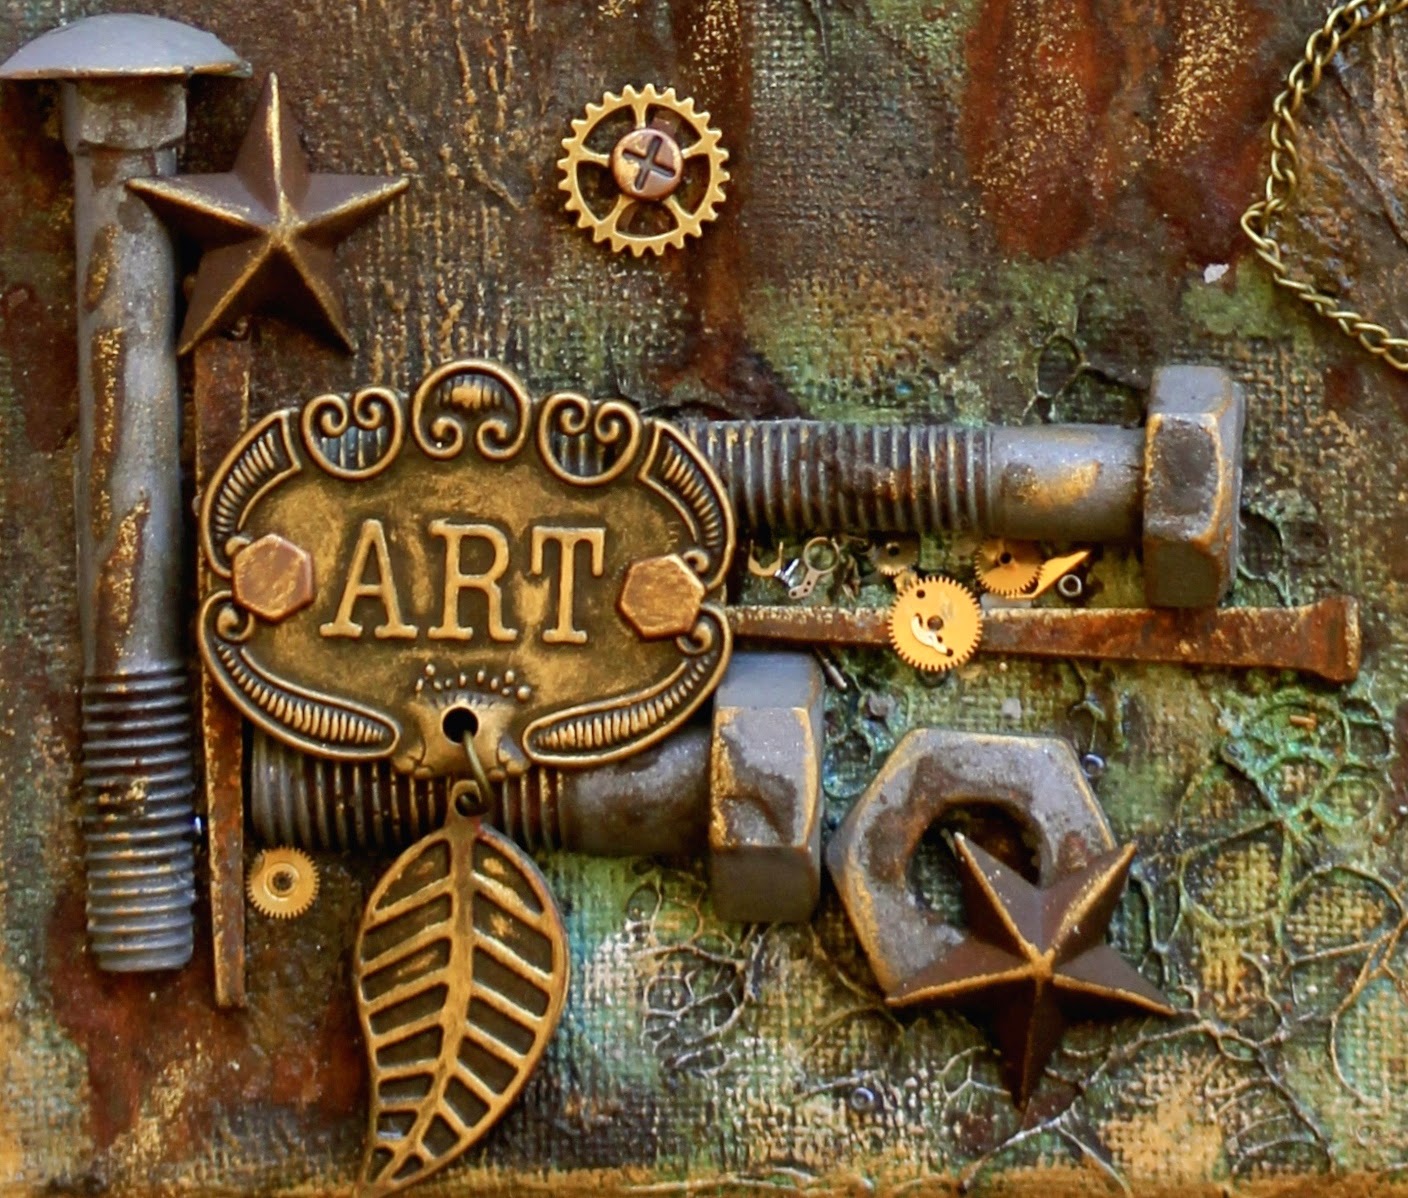
Steampunk Style Mixed Media Canvas - Flying Unicorn

I am here today to share with you a steampunk style mixed media canvas. I wanted to push my color boundaries and go with something a little different (for me), I tend to stick to the blue/green color palette a lot. I decided to head in a rustic direction, however you can see I still managed to sneak in a little blue and green.

Products Used
Handmade rusty nails, rusty resin screws and bolts


I so love the Prima Stamp-N-Add Butterfly Wings, they are so funky and cool. I gave the wings a touch of Silks Pretty Peridot paint combined with a little Inka Gold on the wing edges.


The nuts and bolt have been created using hand poured resin into a mold. I painted the nuts and bolt with a combination of grey and silver paint and finished them off with a light dusting of rusting powder. They look pretty cool right?


Many thanks for looking, I wish you all a happy and creative day.

~ Rebecca ~

Friday, January 23, 2015

Sparkle & Shine Blog Hop & Challenge


Hello Everyone,

Welcome to our Sparkle & Shine blog hop and challenge, thank you so much for stopping by, hopefully you arrived here after visiting the super talented Elena Morgun's blog. 

The project I would like to share with you is a box, this box arrived into my hands after purchasing a pair of sunglasses. I never ever throw away a good box, they are always upcycled into something new. The perfect gift for a good friend, especially when they are filled with chocolates. 


Products Used


Here's how our challenge works:

First of all, make sure you blog hop with our Creative Team. Below you can see the list of all the blogs where you can find some really breathtaking artworks.


Make sure you visit each of the ladies to see in detail how they played with all kinds of sparkling materials. Don't forget to leave a kind comment!


We hope you'll feel inspired and ready to create some sparkle of your own!

The rules of the challenge are very simple indeed - you can create any kind of project (layout/art journal/altered art/ATCs etc) and our Creative Team will vote on their favorite one.


The only rule is: making it sparkle & shine!

The challenge's open 'till February 8th.

Look at this amazing prize you could win...ooooooooh ahhhhhh isnt it beautiful?

Monday, January 19, 2015

Mixed Media Purse - Finnabair Creative Team

Hello Everyone!

I am here he today to share with you all a mixed media purse which I recently created. This small plain balsa wood purse had been sitting in my stash for quite some time, just waiting for the right moment to be given some love and crafting affection. Being a fan of vibrant colours, purses and dangly purse things (I am sure they have a name?), what better project to do than to combine them all together into something amazing. 


To begin I gave the balsa wood bag a light coat of Heavy Gesso (White) and allowed to dry. 


Strips of vintage book paper and washi tape were layered randomly on the front, back and outside edges of the bag. To adhere them to the wood Soft Matte Gel was used. 


To create a small amount of light texture Soft Matte Gel was applied to the outer areas of the bag with a palette knife through the Bubbles stencil. To create the vibrant colour 4 different colours of Dylusions Ink Spray was applied, shading from blue down to green (Calypso Teal, London Blue, Fresh Lime, Cut Grass). 


It is no secret that I love Art Extravagance Texture Paste in Copper Crackle, if you have not used this product yet you really must as it is amazing. On the front of my bag I applied a fairly chunky layer of texture paste and then sprinkled a combination of Copper Glass Glitter, Licorice Glass Beads and small watch parts. I gave them a gentle press to ensure they adhered to the texture paste. With a small amount of Soft Matte Gel I adhered Copper Glass Glitter and Licorice Glass Beads over my material lined Pendant Caps. To finish my Pendant Caps I added two Tassels using jump rings.


Having recently been given a large bag of fabric scraps I used a few different colours to give my bag edges and flower petals a bit more colour. These were adhered to my bag using Soft Matte Gel. A black Faber Castell PITT Pen was used to outline all edges, this included lining all the material, petals, title and my texture paste 'dirt'. 


I almost left the handle in its original state, but nothing wrong with a bit MORE colour right?? the handle was wrapped in various layers of thin strips of material. In order to seal the outer bag and handle I applied a layer of Soft Gloss Gel. Not only did this seal it with an untacky finish it also gave it a lovely gloss lustre. 


To adhere my rusty nails, pendant caps and inner flower mechanicals I used a small amount of 3D Matte Gel. I created a dangly purse thingy (please someone reply and tell me if these 'thingys' have a name) using mechanicals pendant cap, leaves, a key and some random material scraps and ribbon. 


Products Used
Dylusions Ink Spray Calypso Teal


I ask you all to think outside the box as craft can be worn as an accessory, why not give it a try yourself?. Please if you have any questions at all do not hesitate to contact me, I am more than happy to help out. 

I wish you all a happy and creative day.

~ Rebecca ~


Thursday, January 15, 2015

Mixed Media Challenge Jan/Feb - Flying Unicorn

Hi Everyone,

I am happy to be hosting the mixed media / art journal mid month challenge for Flying Unicorn. 

For inspiration for this challenge I have created a double art journal page for you all. The tutorial below will outline how the background was created. Please if you have any questions feel free to ask. 


Products Used
Prima  Sunrise Sunset Paper Collection
Faber Castell PITT Pen Black


1) To begin I gave my double page a coat of Heavy Gesso in color white.
2) I layered paper strips from the Sunrise Sunset collection combined with strips of resist canvas.
3) Random strips of dry wall tape were added.
4) A white wash of water combined with gesso was then painted over the double page.


1) Using a palette knife I applied some Art Ingredients Light Paste through the harlequin stencil.
2) While the light paste is still wet I sprinkled on both mica flakes and glass beads.


Ever used Art Extravagance Crackle Texture Paste? It is amazon!!! and crackles so so well. I LOVE THIS stuff (yes capital letters LOVE). I added a thick spread onto a canvas heart and left it outside in the sun to dry. Look at those amazing cracks. 


My title was created using block stamps, I cut them out and inked the edges. Using the Doily stamp with brown ink I randomly stamped all over the two pages.


The color for my pages is Primary Elements Artist Pigments in Burnt Umber, Ginger Peach. Rose Gold and Yellow Rose. A small amount of powder was mixed in a spritzer bottle. Using a PITT pen I outlined random sections and smudged with my finger.

Thank you for looking, I wish you all a happy and creative day.

~ Rebecca ~

Playdate Thursday - Flying Unicorn

I am here with you today to share a Playdate Thursday technique with you all. Lets talk about Pan Pastels, I am guilty of buying A LOT of them but very rarely using them. However it is new year and on my list of goals this year is to learn more about my craft products which I rarely use and to actually start using them. My background color below has been created with varying shades of pink, blue and purple Pan Pastels.

Products Used

To begin you will need t a stencil and a VersaMark Watermark Stamp Pad (or other embossing pad). I applied the stamp pad directly onto my canvas through the Prima Finnabair Bubbles Stencil. 


Once the ink had dried I begin dabbing on Pan Pastel color with the Pan Pastel foam pad. Using black Pan Pastel I outlined the border.


White Pan Pastel was applied to give shadow to some of my larger bubbles.


Using a black Faber Castell Big PITT Pen I added some black outer shading to the larger bubbles smudged the line with my finger.


A little flick of White Linen Dylusions Ink Spray. 


To complete I layered my Flying Unicorn Adornments, added some Art Ingredients Glass Beads (Licorice) and dabbed on some Viva Inka Gold. Please note the Flying Unicorn Adornments were given a light brush of Silks Paint in colors Sky Blue, African Jade and Rich Cobalt. 


Many thanks for looking, please if you have any questions at all be sure to come visit the Playdate Thursday thread in the forum.

Wishing you a very happy and creative day.

~ Bex ~

Wednesday, January 14, 2015

Compendium of Curiosities 3 : Challenge 19

Hi Everyone, 


Today I am super happy to share with you a tag which I have created especially for the Compendium of Curiosities 3, Challenge No 19.  It has been a month or two since I have created something Tim Holtz style so when last minute I stumbled across this challenge I felt inspired to enter (thanks Curiosity Team your projects were amazing!!). Also coincidentally this week my Mum handed me all her offcuts from a Tim Holtz quilt she is currently putting together for me. What do you do when your Mum hands you a bunch of AMAZING  Eclectic Elements material scraps??, you use them and create!!. 

I love making tags and have never used so much material on one tag before, I LOVE it, yes I am patting myself on my own back. This tag is now proudly on display in my craft room. 

What a fabulous challenge and thank you to Inspiration Emporium and Tim & Mario  for supplying such amazing challenge prizes. 


Thank you all for looking, I wish you a happy and creative day!

~ Rebecca ~ 

Monday, January 5, 2015

Steampunk Style Hair Piece - Finnabair Creative Team

I am  here today to share with you a steampunk style hair piece. Now you may look at this and think, hmmm that is a bit much to wear every day. Yes possibly it is, you would be right.  However, who doesn't want to get a little fancy occasionally? we all do right?. I have always wanted to attempt a hair piece and I am pretty happy with how this has turned out. Can you imagine this with an all black outfit, oh yes I can!. 


Let's talk about how this was all constructed. I began by adhering a piece of 'White Hot' paper from the Sunrise-Senset Collection to a piece of metal backed card. With the metal side up I used foam pad to apply alcohol inks in colours Caramel and Latte. Once dry I added a sprtiz of isopropyl alcohol  (also known as rubbing alcohol) which gave my metal card a beautiful mottled effect. 


I then ran the card stock through my Cuttlebug with the Tattered Florals Die. Finished by inking all the flowers with Walnut Distress Ink and stamping in black ink with the Vintage Vanity Circles stamp.


Using the holes in a alligator hair clip I added jump rings and chain, finishing with adhering ribbon around the entire clip.

Taking one small and one large bottle cap I used 3D Matte Gel to adhere a combination of Copper Glass Glitter, Licorice Glass Beads and small watch parts. Finishing by adding a small Mechanicals metal tassel. The flower is all held together using 3D Matte Gel, please allow adequate time to dry.


Using a small paint brush I applied Aged Bronze Patina to my cogs and to the metal element from the Mechanical Small Leaves 2 collection. A small amount of Viva Inka Gold was then added to give the pieces some further shine. 


I took the small clock from the Mechanicals Clock packet and brushed on a small amount Aged Bronze Patina. After this was dry I added random thick spots of Art Extravagance Texture Paste Copper Crackle. 


The clock face was then filled with small clock parts and Glossy Accents was added to give the face a semi glass look finish.


I had these chipboard leaves in my stash, I gave them a good inking with Walnut Distress Ink, then I applied Art Extravagance Texture Paste Copper Crackle with a small paint brush dabbing it on quite thickly. Once the crackle paste had dried to create a beautiful crackle I then applied more Walnut Distress Ink pushing it into all the cracks. 


As I will be wearing this hair piece I wanted it all to hold together forever and be able to handle being taken in and out of my hair. To hold all my base elements together I used a very strong bond super glue. Beginning with layering feathers then chipboard then my metal leaf with clock. Once these had dried and were securely held in place I used 3D Matte Gel to adhere my flower on top. 

I could not make something like this without actually showing you what it would look like in my hair, here is my selfie for you. I wish this photo was of much better quality, apologies my phone is due a serious upgrade. 


I hope I have inspired you all to create something different and out of the ordinary.

I wish you all a very happy and creative day.

~ Rebecca ~
Alcohol Inks Caramel and Latte