Tuesday, March 31, 2015

Old to New Makeover - Flying Unicorn

Hi Everyone,

Just sharing another op shop makeover. This is a little tea light holder, you pop a little candle underneath and the light beams out of the cut diamonds. This little number cost me a whole $1, so I was prepared to experiment. Yes it was certainly a little drab in its former life wasn't it? So who is brave enough to take their craft products and take them 'off the page'. It is fun converting old to new, I love to challenge myself. 

Products Used

To convert this drab little ball of horror (sorry this is a rather dramatic statement, but that is how I feel). I began by painting with a coat of gesso, after allowing to dry I added color, lots of it, painting here, painting there. Adding black acrylic, rubbing it back, adding more colour, dabbing off with a baby wipe. It is tricky to explain the full color process as with this project it was a little trial and error, if I didn't like it I rubbed it back and just kept on playing. 


This photo was taken in the sun, LOVE the luminous effect, isn't it pretty?


Thanks for looking, I wish you all a happy and creative day.

~ Rebecca ~

Monday, March 23, 2015

Wine Not? - Finnabair Creative Team

Hi Everyone, 

I am here with you today to share a wine box mixed media makeover. As I have mentioned quite a few times before I love my op shop hunting. I love taking something old and unwanted and turning it into something new and special. When I found this box sitting on a shelf for $4 I just knew it had to come home with me, time for a little refresh, time to give it some much needed love. 


So as you can see the box was kind of pretty, but not really my cup of tea (or coffee usually in my case). For my style it was just a little bleh, so to begin my project I removed all the metal closures and handle and then gave the entire box a coat of Art Basic White Heavy Gesso


The colour I have chosen to paint the box is Lumiere Paint by Jacquard in Pearlescent Blue.  Once the paint was completely dry I gave the box a thin coat of Art Basics Heavy Black Gesso. Not allowing the black gesso to dry completely, once it became slightly opaque I lightly began to rub it back with a baby wipe. 


Adding a large glob of Art Basics 3D Gloss Gel to my craft mat, with a palette knife I began to work in Rust Mica Powder and Black Micro Beads. Using the palette knife I applied the 3D Gel mixture through the Prima Chicken Wire Stencil to the sides of my wine box. Once completely dry I shaded around my chicken wire with a Faber Castell Black PITT pen and then smudged it with my finger. 


Using 3D Matt Gel I adhered a selection of random metal and chipboard elements. You will see below earrings, can ring pulls, buttons, and various filigree metal embellishments. Once all my embellishments were secure I gave everything (including my fork) a coat of Art Basics Heavy White Gesso


Now the colour can come in, to create my colour I have used a number of different mediums. I painted the embellishments first with a combination of Lumiere Pearlescent Blue and Lumiere Halo Blue Gold. I then spritzed some mica powder which had been pre mixed in little spritzer bottles. The mica colours I used include BlueGold & Rust.  Once completely dry I then again gave another coat of Art Basics Heavy Black Gesso, then rubbed it all back with a baby wipe.


Art Ingredients Micro Beads in black were adhered all around my embellishments.


Applying the black gesso did dull a little of the sparkle, and who doesn't love sparkle?. To bring back some razzle dazzle I sprinkled on some Rust and Gold Mica Powder and then spritzed with water. This was added both to the embellishments and to the box top and sides. 


To balance the top of the box I added chain, Art Ingredients Black Micro Beads and a 'Create' Mechanical. 


Products Used
Prima Mechanicals - Create

Thank you all for joining me here today, as always if you have any questions please feel free to ask.

Wishing you all a fabulous and creative day.

~ Rebecca ~ 

Friday, March 20, 2015

Compendium of Curiosities III Challenge No 24 - Remnant Rub Resist

Hi Everyone,

Today I would like to share with you a tag which has been created for both the Flying Unicorn Creative Team as well as for the Compendium of Curiosities Challenge No 24. 

For challenge No 24 there is an amazing chance to win a $25 gift voucher to spend at the The Funkie Junkie Boutique. Thank you for sponsoring the challenge this month. 

After some months of waiting only this week my Cracked Pistachio Distress Ink arrived, HOORAY!!!. This is the first project I got to try it out on and woweeeee does it ever look amazing, especially with Squeezed Lemonade and Peacock Feathers. 

For my tag I have added a number of different adornments from the Tim Holtz collection. As well you will spot watch parts, quite a few of them (I have a slight addiction!!). 


Many thanks for looking, I wish you all a happy and creative day.

~ Rebecca ~ 

Sunday, March 15, 2015

Vintage Conversion - Finnabair Creative Team


Hi Everyone,

 I decided to convert a small vintage wooden box which I picked up at a garage sale, I so love picking up vintage finds (ready for conversion!). To begin my project I gave the entire box a light sand coat of white gesso. The inner part of the box top is cushioned, I covered this with a brushing of soft gloss gel and then added scripted washi tape to the surface (note the sides were covered in the same way). After painting and allowing ample time to dry it was time to add my stamped image. My beautiful 'don't forget to fly stamp' was stamped onto white tissue paper. I carefully tore the image from the sheet leaving a slight edge. To apply to the cushioned section of the box I used soft gloss gel both underneath and over the top. This blended the image perfectly into the box lid. Copper Micro Beads edge the frame and a hint of Gold Micah Powder can be seen around the stamped image also. Finishing it off you will see some metallic gold thread which has been woven through my metal corners.


Art Basics Soft Gloss Gel - 961435
Art Ingredients Micro Beads Copper - 962579
Art Basics Heavy Gesso White - 961374
Art Ingredients Micah Powder Gold - 962524
Finnabair Crackle Clear Stamp - 961855
 Finnabair Create Magic Stamp - 96207
Finnabair Don't forget to fly Stamp - 96213

If you have any questions at all please feel free to ask.

~ Rebecca ~ 

Mixed Media Tags - Flying Unicorn

Hi Everyone,

Today I am sharing a few tags which I created as demo's for my local craft group (I will be running a class on these tags shortly, eeeeeek!!! <nervous>). I know I have covered this style many times before but I really wanted to share again as it really showcases the beautiful Flying Unicorn Adornments and Silks Paints. 


Many thanks for looking and I wish you all a very happy and creative weekend.

~Rebecca ~

Monday, March 9, 2015

Let's tour my craft room!!!

Hi Everyone,

Today I thought I would bring to you all a different blog post, today we are going to have a good look around my craft room. This has really turned into the crafting room of my dreams and I am super  proud to share it with you all.  My inention of sharing all these photos is definitely not to show off, more to share with you all what I think are some practical storage craft solutions.

Here is a shot of the entire room, I am extremely fortunate to have a room of this size to call my own. Before we bought our home this room was previously used as an at home family daycare. We tore up the smelly carpet, laid down some vinyl (much more practical!!) and gave it a fresh coat of paint. Lucky enough to have a toilet, basin and storage cupboard, these are the two doors you can see at the back of the room. 

When I get enough confidence up my future plans are to hold classes here as there is room for four people to craft. 


3 essential items can be seen here for long days crafting, my Mac, TV and air conditioning 


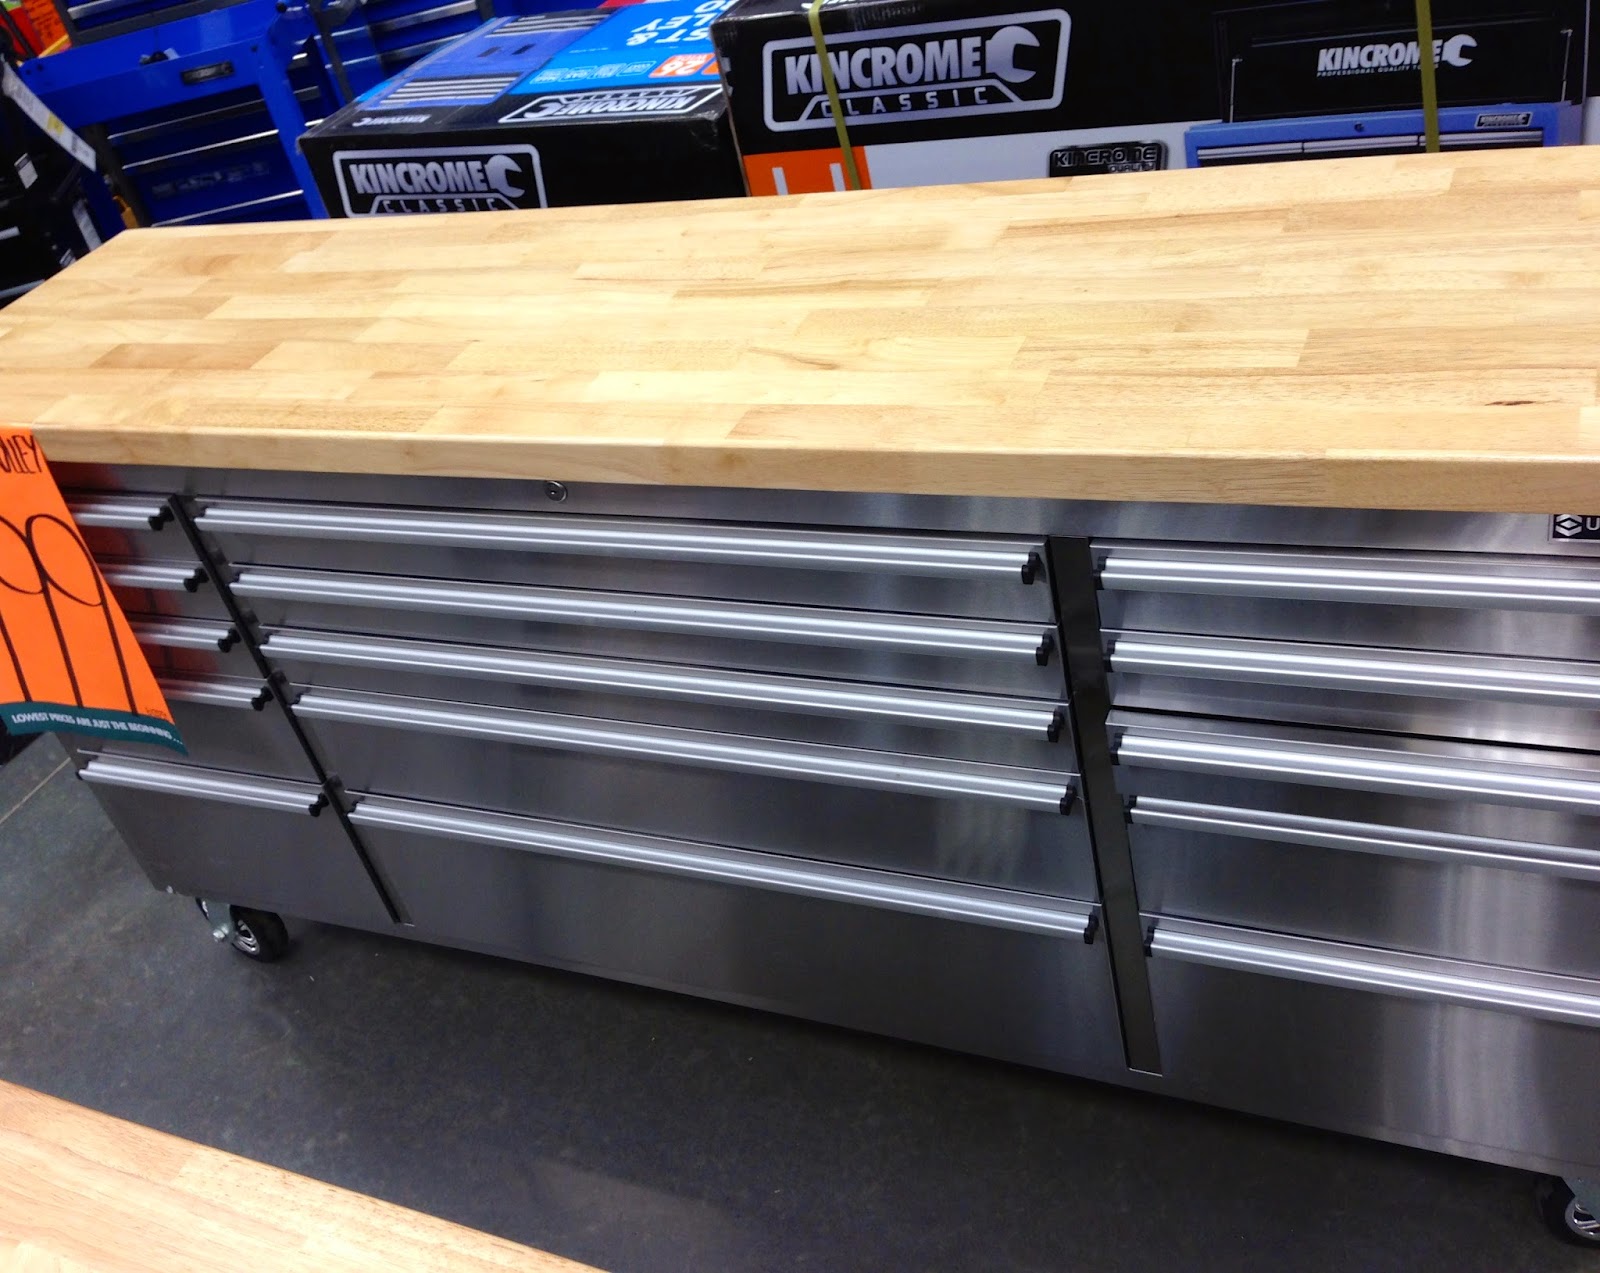
A trip to our local hardware store Bunnings and this was there!! It was honestly love at first sight. I never ever thought about putting a toolbox in my craft room but one this pretty??, yes please. 


Welcome home tool chest. 


Drawer 1 - Inks, sponges and daubers. 


Drawer 2 - Inks etc. 


Drawer 3 - Stamps


Drawer 4 - Punches


These storage trolleys from Ikea are PERFECT and I mean PERFECT for holding all your mixed media items. I started with one but it very quickly became apparent that I needed two, back to Ikea I went. 


Ikea Expedit 5 x 5 shelving, used for displaying projects. 


Ikea Expedit 5 x 5 shelving, used for storing kits, books, layouts. The brown baskets store lace, ribbon, chipboard, flowers. 


Picked up these paper racks when my LSS closed down, they were a bargain and a great place to store paper and card stock. 


I picked up this clip-it-up system on eBay for a steal, my stamps are now all organised and it is very easy to flick through them all and decide what I want to use. 


I love metal embellishments, love them to bits. You will very rarely see a flower in any of my projects, you will however always see metal. 

Box 1 - I call this my steampunk box.


Box 2 - Filigree embellishments, flowers, hearts and pins. 


Box 3 - Op shop box, here you will find all my op shop find. Every week I visit my local op shop to see what is new, picking up earrings, buttons, cutlery etc. 


Box 4 - Flying Unicorn Adornments, ahhhh so many pretties. 


All my other metal embellishments are stored in these which I have two of. 


Yes more Ikea, rails, cups and baskets. Perfect places to store pens, brushes etc. On the metal hooks you will see rings full of keys. 


I call this my wall of Finnabair, isn't it lovely?. I really wanted to keep my Finnabair creative team products away from the rest of my products. So yes, here we have more Ikea products to keep all my goodies contained. 


 My bigger Finnabair items are kept in these little cases.


Thank you so much for touring my craft room with me, if you have any questions at all on how I set it up or where anything was purchased from please let me know. 

Wishing you all a very happy and creative day. 

~ Rebecca ~ 

Saturday, March 7, 2015

Compendium of Curiosities III Challenge No 23 - London Folio

Hi Everyone, 

I am here today to share with you a decorated Tim Holtz Collection Folio.  I had been looking for a creative way to showcase some of my photos from my trip to London last year and this folio was perfect. The creative mojo was in full action and creating this project was such a pleasure, really made me happy. 


I am sure by now we have all seen the Tim Holtz Emphemera packets? wow they are jam packed with gorgeous emphemera. They just keep going and going, I have created two projects with them now and still have some left (yay!). You will see them used throughout my folio below. 

I am entering this folio into the Compendium of Curiosities Challenge No 23 for an amazing chance to win a $50 gift voucher to spend at the Inspiration Emporium (I love that store!!!).

I have photographed my folio front, back and then all through the inside in order. My printer went bonkers went I printed my photos, I ended up with streaks. Rather than reprint I decided to use them, it kind of looked cool and fitted in. Enjoy your visual journey through my folio.

Products Used


Many thanks for looking, I wish you a happy and creative day.

~ Rebecca ~